

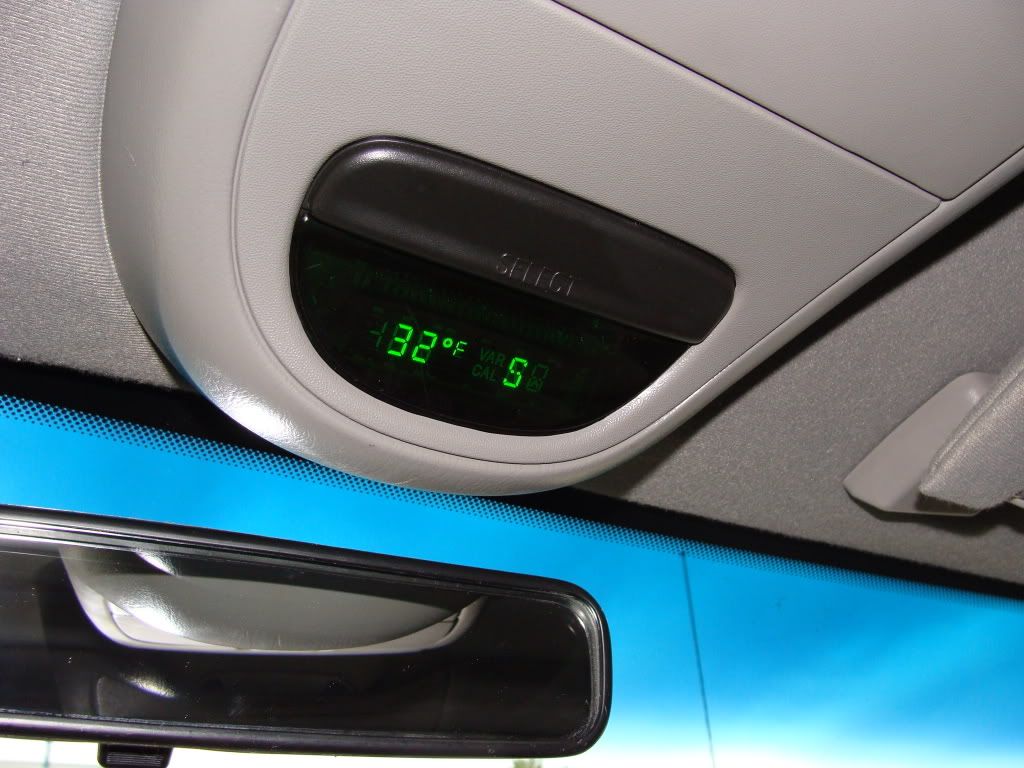
Overhead Console Temp Display Repair
#1
 12-18-2009, 01:21 AM


Overhead Console Temp Display Repair
Does your console not light up anymore?
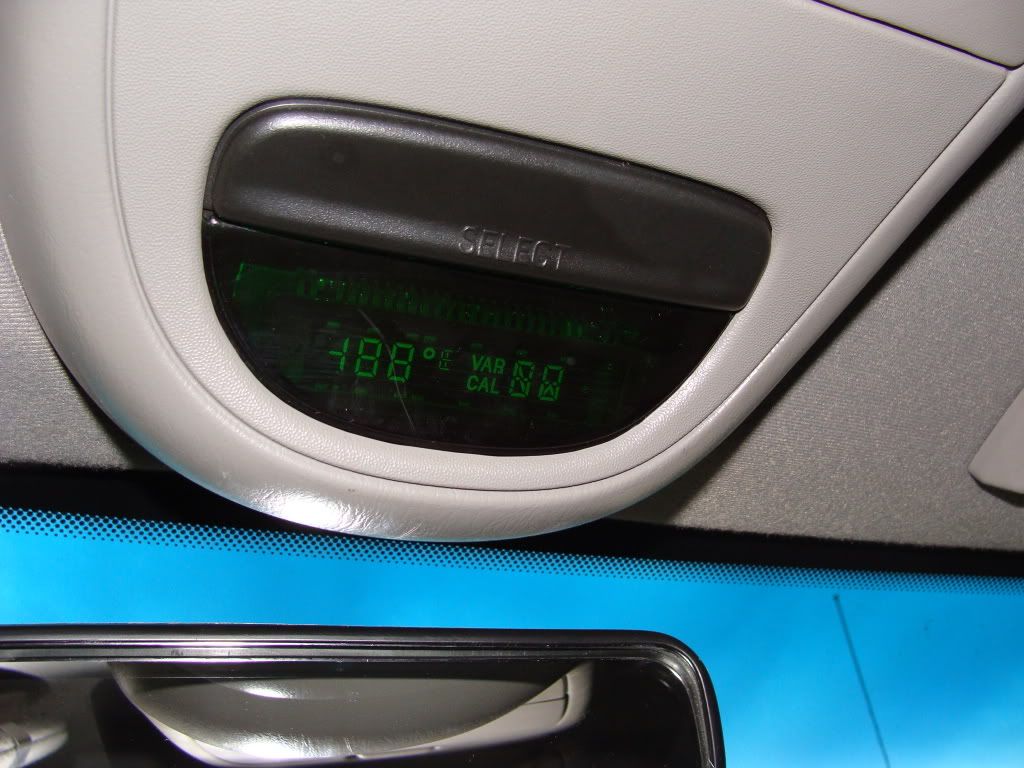
Before you start the process, cycle the button a couple times to make sure its not just turned off.
Tools needed:
#2 Phillips
T10 bit/driver
Soldering gun & solder
If you are not experienced with a soldering gun use caution, or let someone tackle this that knows how to do the repair safely.
I am not responsible for any damages to you or your truck, this is merely a guideline to go by, individual results may vary
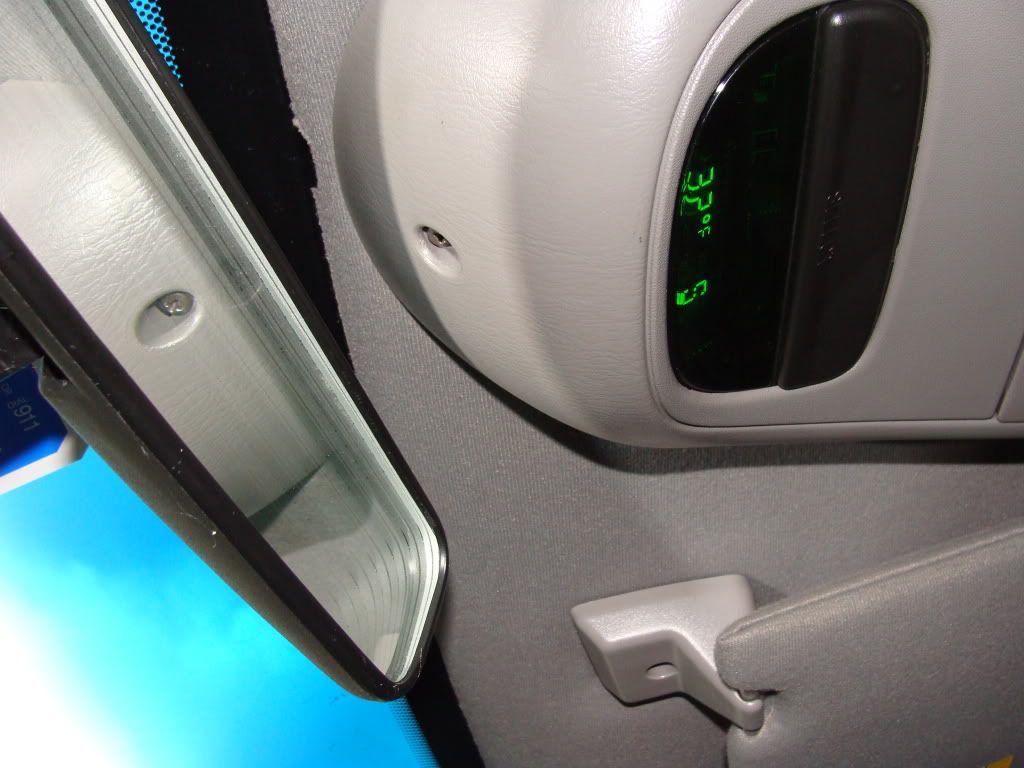
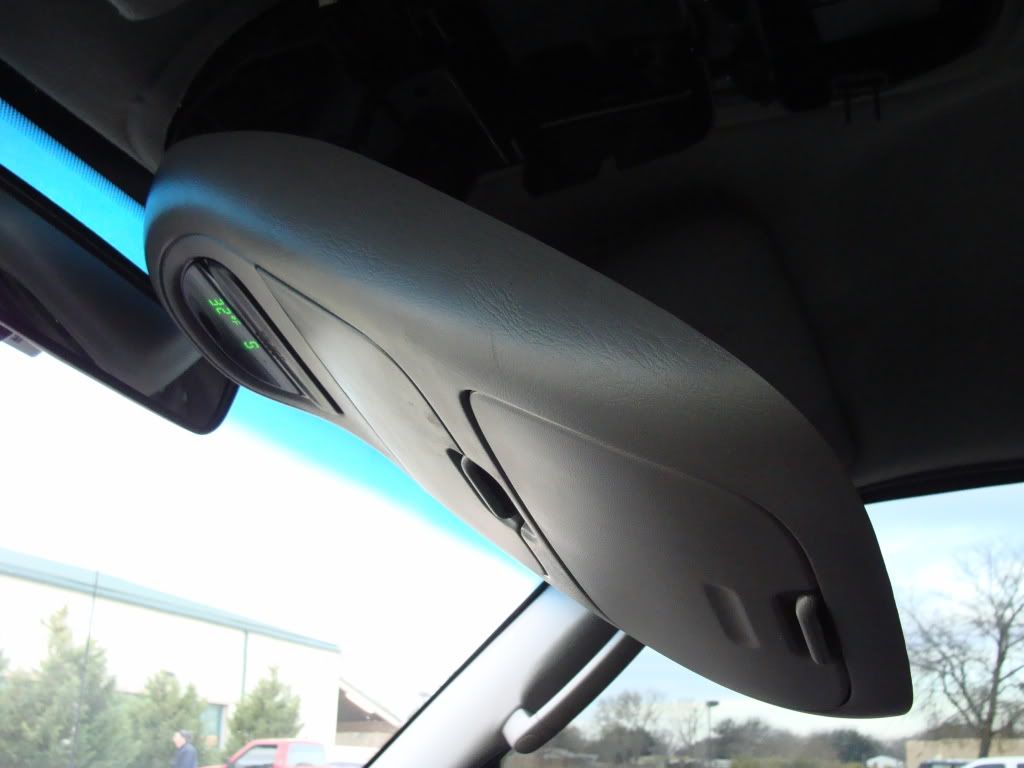
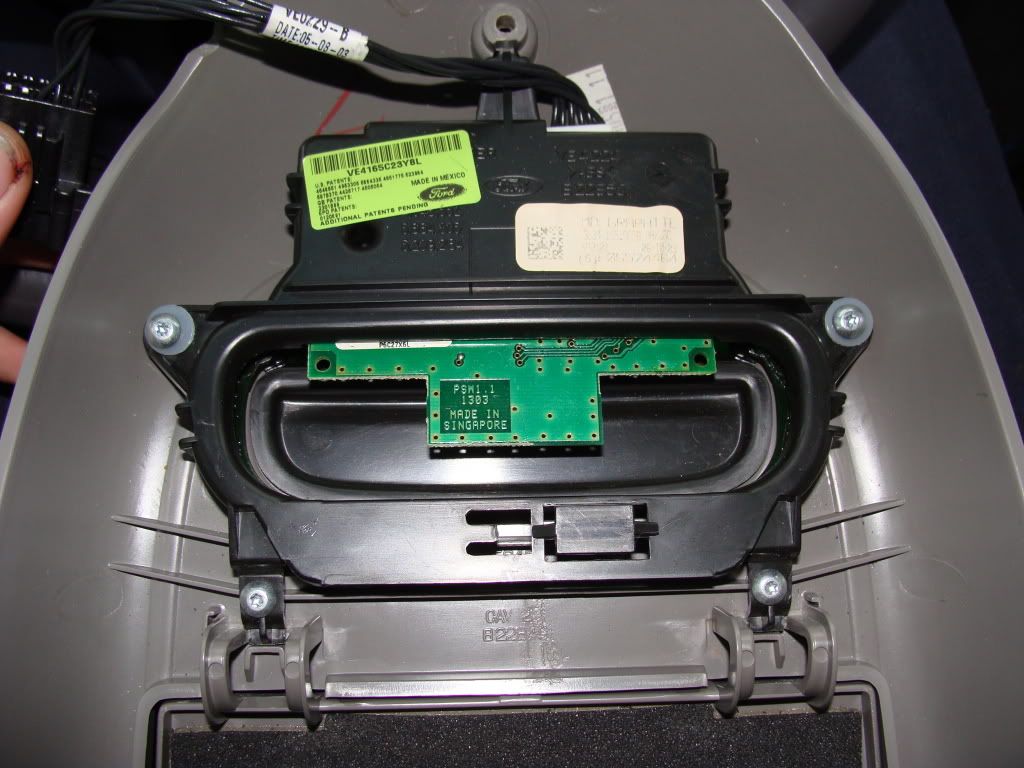
Start by removing the Phillips screw located above the mirror
In the rear door, there are plastic tab that have a metal clip. (one on each side) But all you need to do is just grab the console firmly and pull straight down on it. The console will pop off, make sure you dont pull too hard or you risk damaging the wires on the display.
The wiring connector is just clipped on the display, just slide it straight right to left
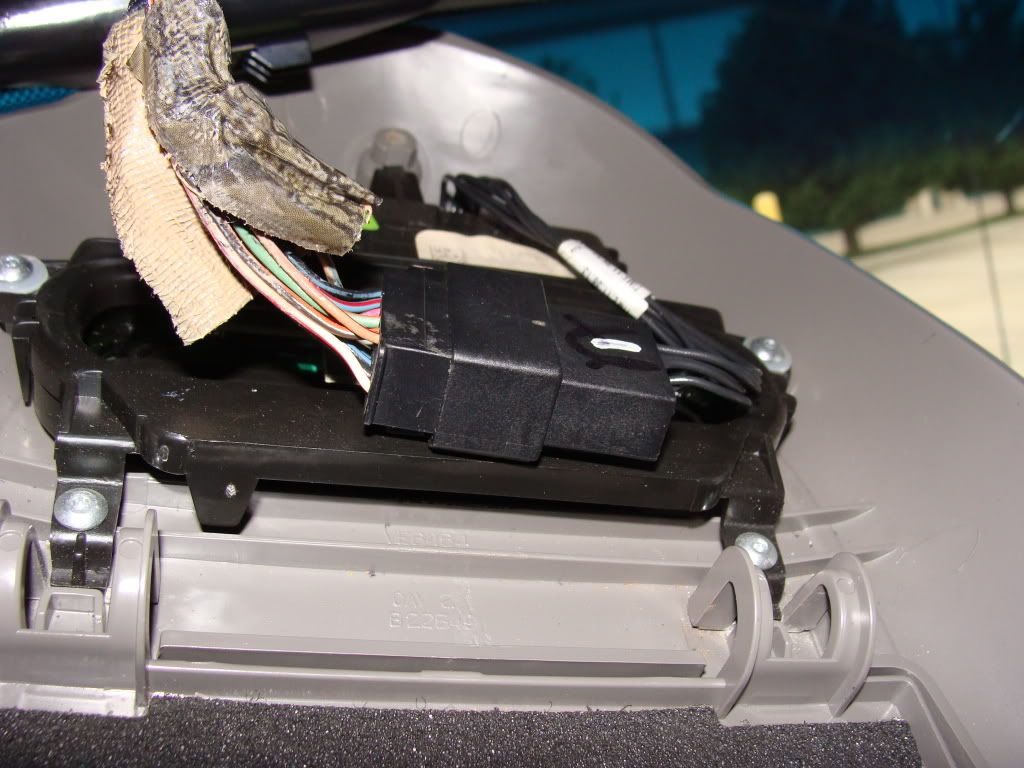
Disconnect the wiring connector, and take the console to your work bench (tailgate) and prepare to disassemble it.
Next you will see the 4 T10 screws.
Once removed, you will have the entire display unit
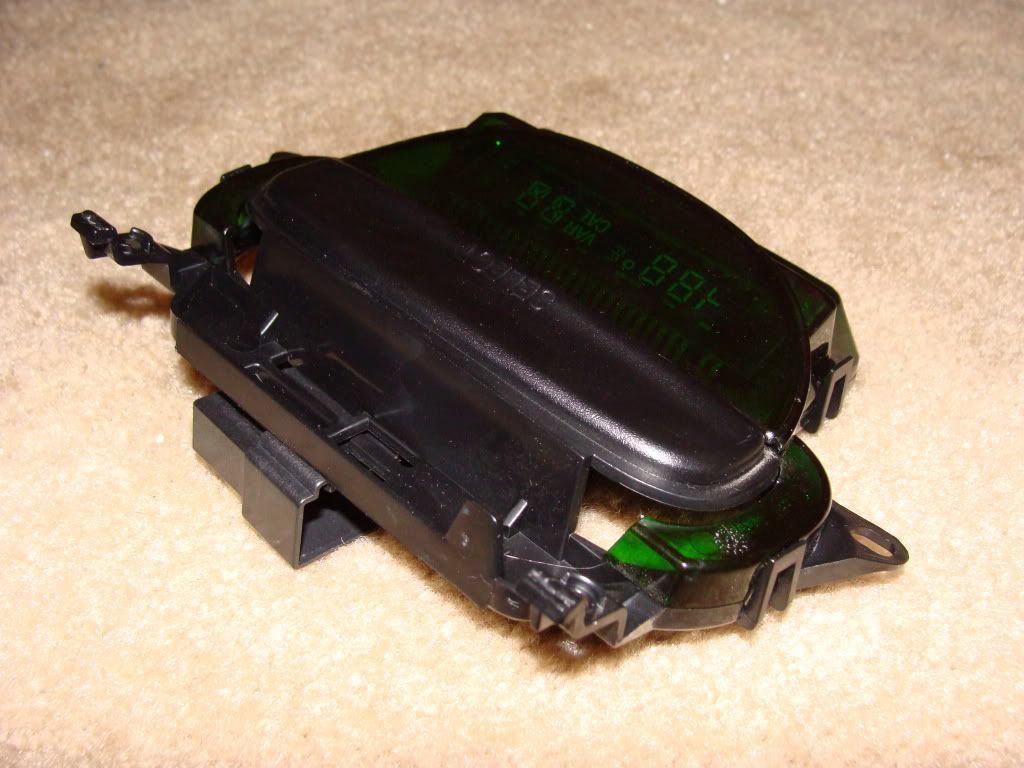
Take the green lens off, its just two clips to the housing on each side
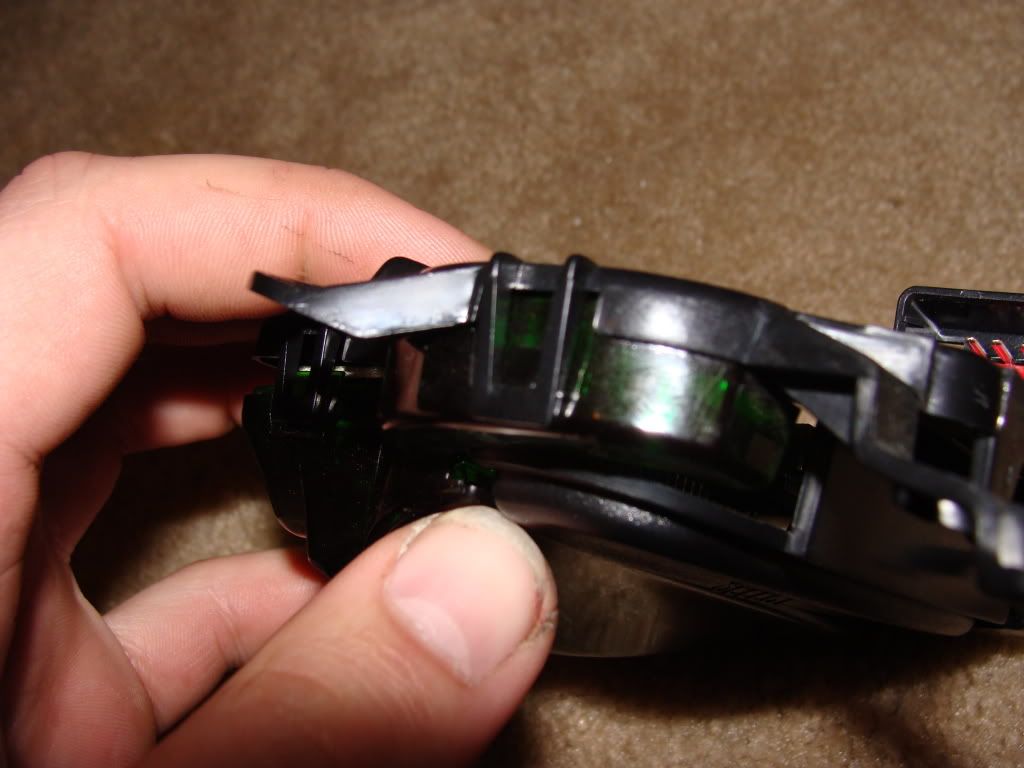

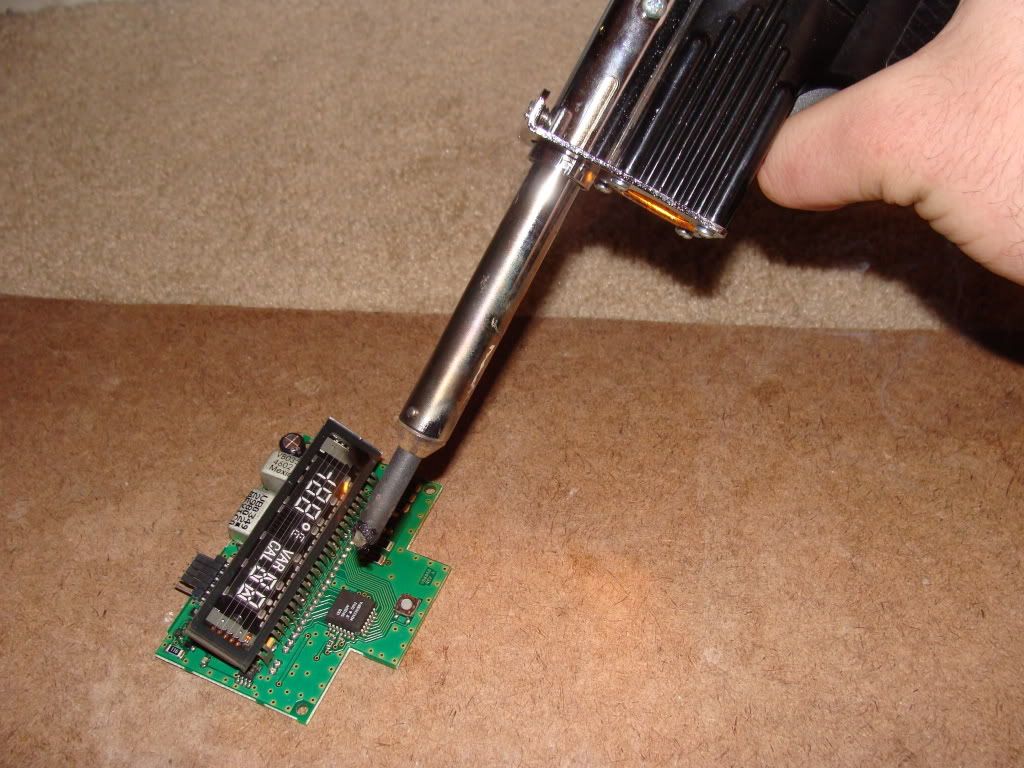
The circuit board will just lift out of black housing. You can choose to disconnect the jumper harness from the board, or leave it on there and work around the harness and housing

Now that its fully disassembled we will now go over the repair process.
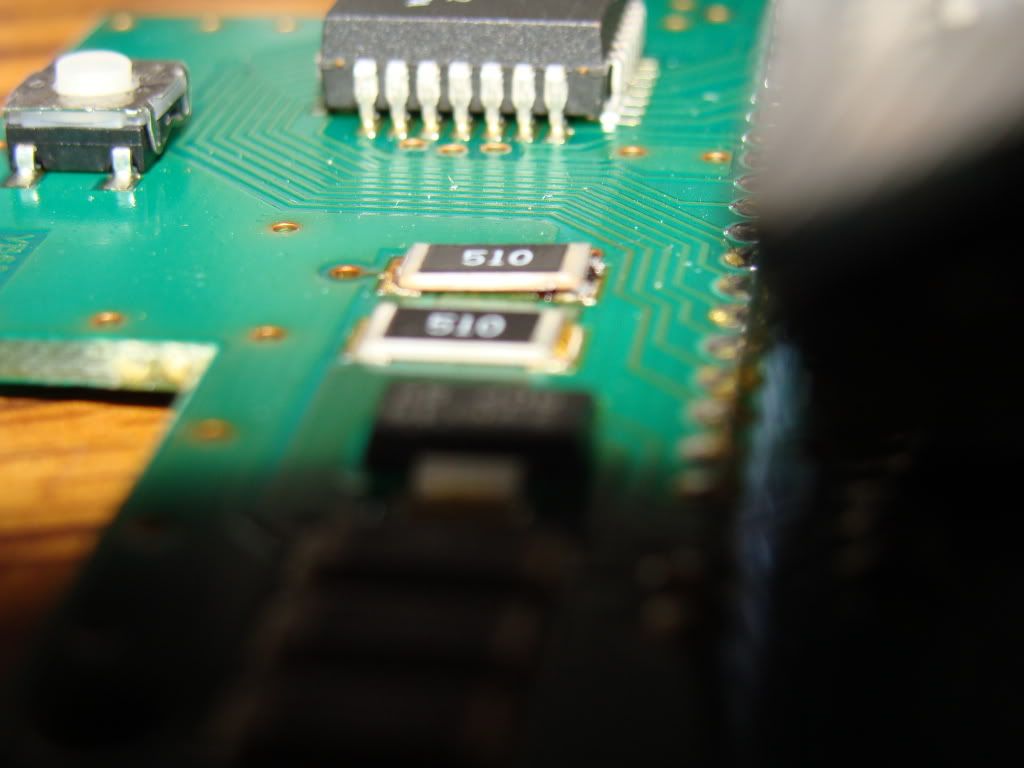
This resistor is the concern and will be the focus of my next series of pictures
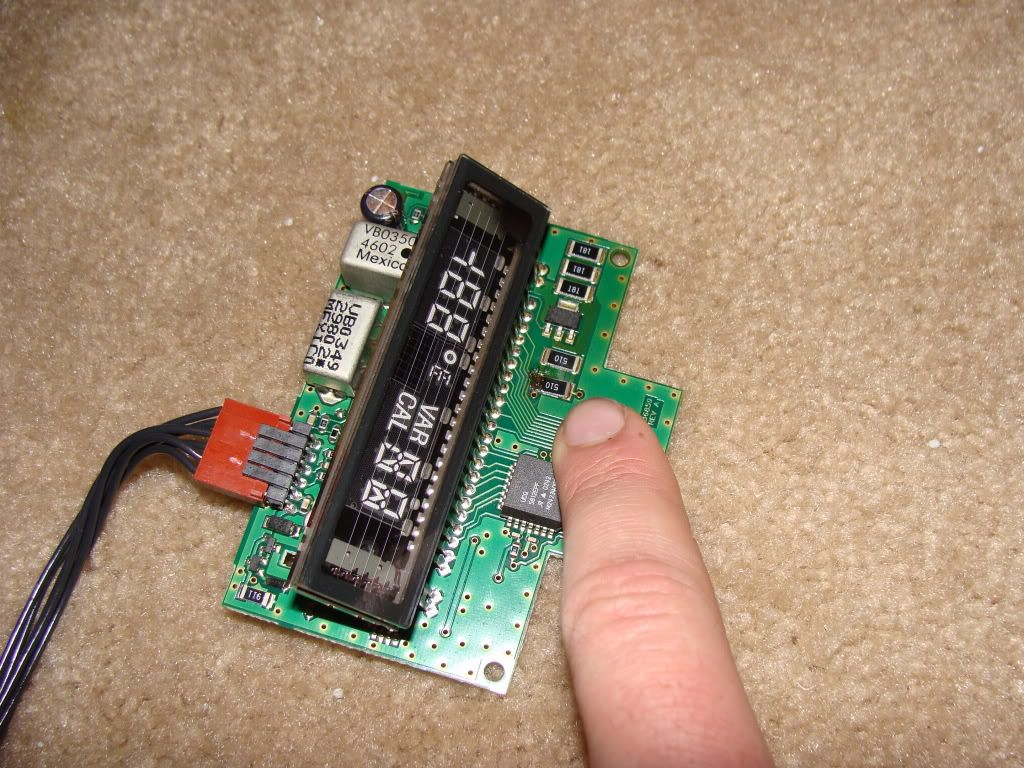
From the side you can see that the resistor has popped up from the board slightly. I think this has to do with the board being suspended upside down in the truck and subjected to large temperature changes.
The repair process is actually quite simple, just a matter of heating up the solder, and nudging the resistor flat again, adding a pinch of new solder if needed.
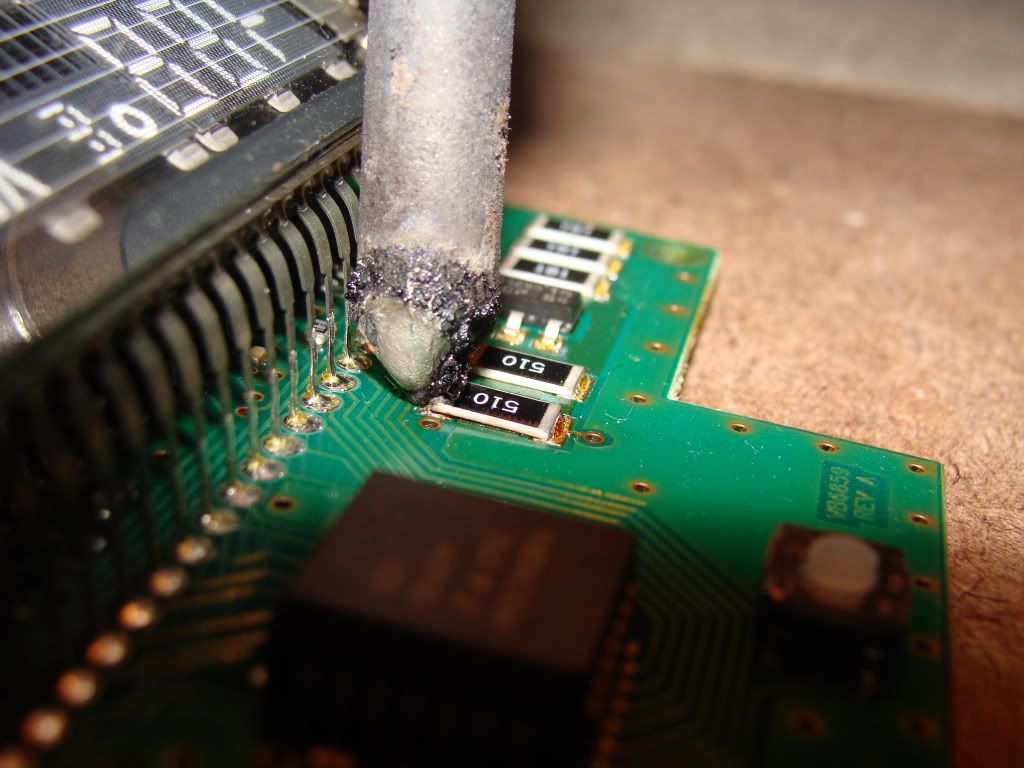
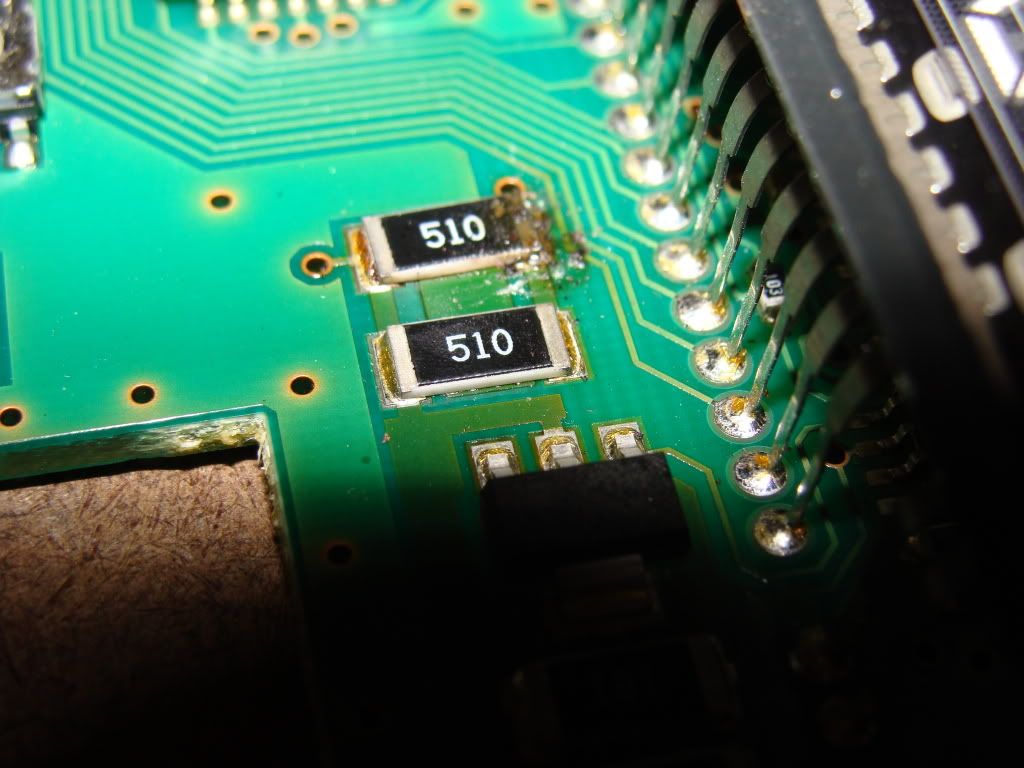
Make sure its got full solder all the way across width of the resistor and you should be good to go.
Test the display on the truck before you completely put the display and console all back together
From there work back words through the steps and reassemble the display and console.
Put it back together after successful test run and enjoy!
If you see another resistor starting to lift, you may want to give it some loving with the soldering gun, but might not be needed.
Good luck.
Before you start the process, cycle the button a couple times to make sure its not just turned off.
Tools needed:
#2 Phillips
T10 bit/driver
Soldering gun & solder
If you are not experienced with a soldering gun use caution, or let someone tackle this that knows how to do the repair safely.
I am not responsible for any damages to you or your truck, this is merely a guideline to go by, individual results may vary
Start by removing the Phillips screw located above the mirror
In the rear door, there are plastic tab that have a metal clip. (one on each side) But all you need to do is just grab the console firmly and pull straight down on it. The console will pop off, make sure you dont pull too hard or you risk damaging the wires on the display.
The wiring connector is just clipped on the display, just slide it straight right to left
Disconnect the wiring connector, and take the console to your work bench (tailgate) and prepare to disassemble it.
Next you will see the 4 T10 screws.
Once removed, you will have the entire display unit
Take the green lens off, its just two clips to the housing on each side
The circuit board will just lift out of black housing. You can choose to disconnect the jumper harness from the board, or leave it on there and work around the harness and housing
Now that its fully disassembled we will now go over the repair process.
This resistor is the concern and will be the focus of my next series of pictures
From the side you can see that the resistor has popped up from the board slightly. I think this has to do with the board being suspended upside down in the truck and subjected to large temperature changes.
The repair process is actually quite simple, just a matter of heating up the solder, and nudging the resistor flat again, adding a pinch of new solder if needed.
Make sure its got full solder all the way across width of the resistor and you should be good to go.
Test the display on the truck before you completely put the display and console all back together
From there work back words through the steps and reassemble the display and console.
Put it back together after successful test run and enjoy!
If you see another resistor starting to lift, you may want to give it some loving with the soldering gun, but might not be needed.
Good luck.
Last edited by Bluejay; 12-18-2009 at 09:40 AM.
#2
12-18-2009, 02:24 AM


#4
12-18-2009, 08:21 AM

Senior Member
#5
12-18-2009, 09:56 AM

Senior Member
#6
12-18-2009, 09:58 AM

Senior Member
Join Date: Oct 2006
Location: IN A DUCK BLIND
Posts: 253
Likes: 0
Received 0 Likes
on
0 Posts
#7
12-18-2009, 11:03 AM

Trending Topics
#9
12-18-2009, 05:16 PM
#10
12-18-2009, 09:07 PM
#11
12-19-2009, 12:32 AM
#12
01-12-2010, 12:14 PM

Member
Join Date: May 2005
Location: Shelter Island,NY
Posts: 19
Likes: 0
Received 0 Likes
on
0 Posts
Just came across your post.
My problem is if I have a overnight temp of say 40, it will stay at that temp even if the temp goes up to 70 during the day. On the other side if the temp is at 70 when I park the night before in the morning it will go down to the real temp. Hope somebody out there knows what is going on.
Thanks

My problem is if I have a overnight temp of say 40, it will stay at that temp even if the temp goes up to 70 during the day. On the other side if the temp is at 70 when I park the night before in the morning it will go down to the real temp. Hope somebody out there knows what is going on.
Thanks
#13
01-13-2010, 01:56 AM

Senior Member
Join Date: Aug 2007
Location: Scottsdale, Arizona
Posts: 2,441
Likes: 0
Received 0 Likes
on
0 Posts
#14
01-13-2010, 03:59 AM
#15
01-18-2010, 12:06 AM
dunno havent tried it, ill take a look at some point and see what happens, maybe 5 minutes of work to test it out