
Couple tweaked photos.


#62
 08-21-2009 | 11:25 PM

Technical Article Contributor
Joined: Mar 2005
Posts: 4,387
Likes: 9
From: OH-IO

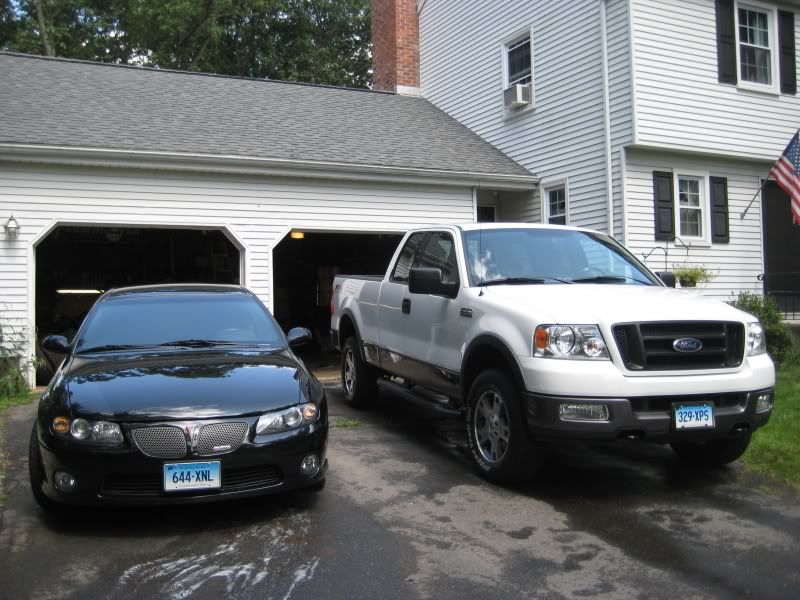
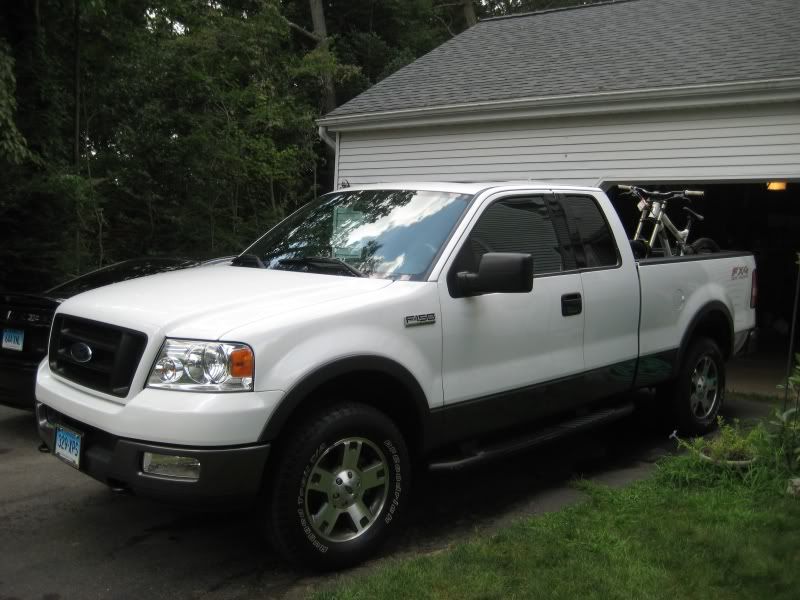
These pics are awesome, feel free to tweak any photos I have in my gallery. Here are two of my favorites, I'd love to see what you could do with them.


P.S. I still have the unmolested originals of these two pics if you need them, I just uploaded the originals into photobucket, here they are.
http://i254.photobucket.com/albums/h...roparks004.jpg
http://i254.photobucket.com/albums/h...ks020-Copy.jpg
entire PB album http://s254.photobucket.com/albums/hh84/05redfx4/
Last edited by 05RedFX4; 08-21-2009 at 11:50 PM.

#64
08-22-2009 | 12:31 AM

Thread Starter
|
Senior Member
Joined: Jul 2007
Posts: 487
Likes: 1
From: WA
Hey Rob, a tip... First thing I do is use the quick selection tool and brush, to select the vehicle and I work on it, and the background separately. When you select the vehicle and work on it, then invert selection and work on the other. Then deselect and do a touch over on the whole picture.


#67
08-22-2009 | 08:44 AM

Senior Member
Joined: Sep 2008
Posts: 1,473
Likes: 0
From: Plano, TX
Heres my sad attempt. :o
Are you using only Topaz? Or other things too?
Hey Rob, a tip... First thing I do is use the quick selection tool and brush, to select the vehicle and I work on it, and the background separately. When you select the vehicle and work on it, then invert selection and work on the other. Then deselect and do a touch over on the whole picture.
#68
08-22-2009 | 12:43 PM
Thread Starter
|
Senior Member
Joined: Jul 2007
Posts: 487
Likes: 1
From: WA
I see you used Topaz's Clean 2?
I use Photoshop Elements and what I do there is:
First go into Enhance and go down to adjust lighting, levels. Or Ctrl L.
I use the black eyedropper on something thats pure black in the photo, or suppose to be black. Then I use the white one to do the same for a white spot. This will take a tiny bit of practice. What it's doing is making your whites white, and blacks black. Some photos can have bad white balance and usually every photo taken can use a bit of help with this tool to look a lot better.
After that then I use the quick selection tool to wrap around/select the vehicle. That tool can be a PIA in a photo with similiar contrast throughout. So you can use it at first and then refine it with the selection brush tool to get the edges perfect. To get to the tool you right click on the brush and it brings up the option.
After you have isolated the vehicle, right click and go invert selection, so you can work on the background. Thats when I go down to TOPAZ's ADJUST 3 tool. I usually click on Spicify and Vibrance to see what they look like. If one looks sort of decent to me then I just adjust it a bit until I like it and open it. You can go back through it for different effect numerous times.
After all that I Use Topaz Denoise 3, and then select HD Jpeg. Then I save it.
I usually open it with Picnik and then hit it with a vignette border to give a good feel.
I've used these a couple times
http://www.youtube.com/results?searc...&oq=photoshop+
Last edited by Moltenice; 08-22-2009 at 12:54 PM.


#72
08-22-2009 | 01:54 PM
Senior Member
Joined: Sep 2008
Posts: 1,473
Likes: 0
From: Plano, TX
I see you used Topaz's Clean 2?
I use Photoshop Elements and what I do there is:
First go into Enhance and go down to adjust lighting, levels. Or Ctrl L.
I use the black eyedropper on something thats pure black in the photo, or suppose to be black. Then I use the white one to do the same for a white spot. This will take a tiny bit of practice. What it's doing is making your whites white, and blacks black. Some photos can have bad white balance and usually every photo taken can use a bit of help with this tool to look a lot better.
After that then I use the quick selection tool to wrap around/select the vehicle. That tool can be a PIA in a photo with similiar contrast throughout. So you can use it at first and then refine it with the selection brush tool to get the edges perfect. To get to the tool you right click on the brush and it brings up the option.
After you have isolated the vehicle, right click and go invert selection, so you can work on the background. Thats when I go down to TOPAZ's ADJUST 3 tool. I usually click on Spicify and Vibrance to see what they look like. If one looks sort of decent to me then I just adjust it a bit until I like it and open it. You can go back through it for different effect numerous times.
After all that I Use Topaz Denoise 3, and then select HD Jpeg. Then I save it.
I usually open it with Picnik and then hit it with a vignette border to give a good feel.
I've used these a couple times
http://www.youtube.com/results?searc...&oq=photoshop+
I use Photoshop Elements and what I do there is:
First go into Enhance and go down to adjust lighting, levels. Or Ctrl L.
I use the black eyedropper on something thats pure black in the photo, or suppose to be black. Then I use the white one to do the same for a white spot. This will take a tiny bit of practice. What it's doing is making your whites white, and blacks black. Some photos can have bad white balance and usually every photo taken can use a bit of help with this tool to look a lot better.
After that then I use the quick selection tool to wrap around/select the vehicle. That tool can be a PIA in a photo with similiar contrast throughout. So you can use it at first and then refine it with the selection brush tool to get the edges perfect. To get to the tool you right click on the brush and it brings up the option.
After you have isolated the vehicle, right click and go invert selection, so you can work on the background. Thats when I go down to TOPAZ's ADJUST 3 tool. I usually click on Spicify and Vibrance to see what they look like. If one looks sort of decent to me then I just adjust it a bit until I like it and open it. You can go back through it for different effect numerous times.
After all that I Use Topaz Denoise 3, and then select HD Jpeg. Then I save it.
I usually open it with Picnik and then hit it with a vignette border to give a good feel.
I've used these a couple times
http://www.youtube.com/results?searc...&oq=photoshop+

#73
08-22-2009 | 02:04 PM
Thread Starter
|
Senior Member
Joined: Jul 2007
Posts: 487
Likes: 1
From: WA
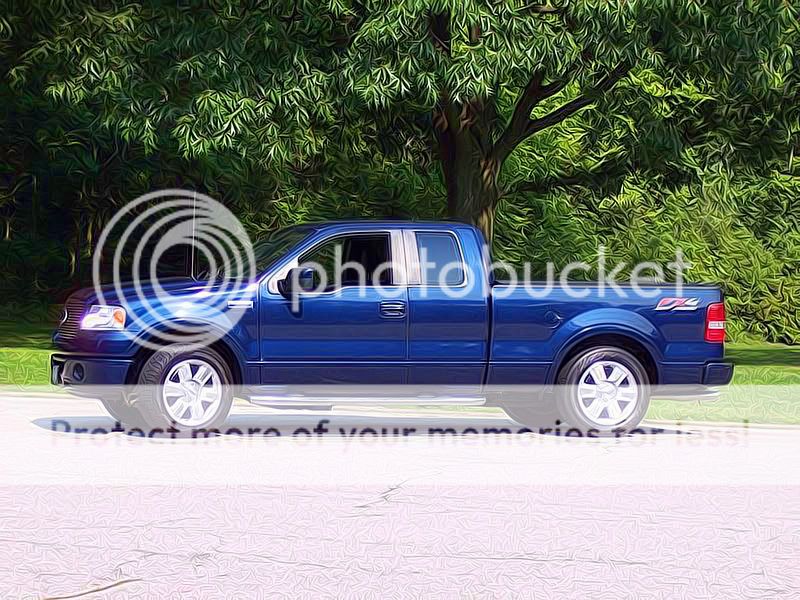
Well here is an example of a fix, and no real tweaking. I removed most of the magenta hue that was over the ground, brought out the greens in the tree again, and adjust white balance, mostly seen with the black on the tires and the white on the parking spot lines.
Then a quick Denoise to counteract the compression from uploading it here.
Old

Fix

Then a quick Denoise to counteract the compression from uploading it here.
Old
Fix
#74
08-22-2009 | 02:07 PM
Thread Starter
|
Senior Member
Joined: Jul 2007
Posts: 487
Likes: 1
From: WA
Another good Topaz tool is the Denoise 3. Their free trials rock to test them out for 30 days.
#75
08-22-2009 | 02:12 PM

Senior Member
Joined: Jul 2009
Posts: 100
Likes: 0
From: Montgomery, AL
of if you know where to download the full versions =P