RockPick's King Ranch
#1
 01-17-2009, 06:47 PM


Join Date: Oct 2003
Location: New York
Posts: 89
Likes: 0
Received 0 Likes
on
0 Posts
#2
01-17-2009, 08:22 PM


#4
01-17-2009, 09:01 PM

Suspended
Join Date: Sep 2005
Location: San Diego
Posts: 2,622
Likes: 0
Received 0 Likes
on
0 Posts
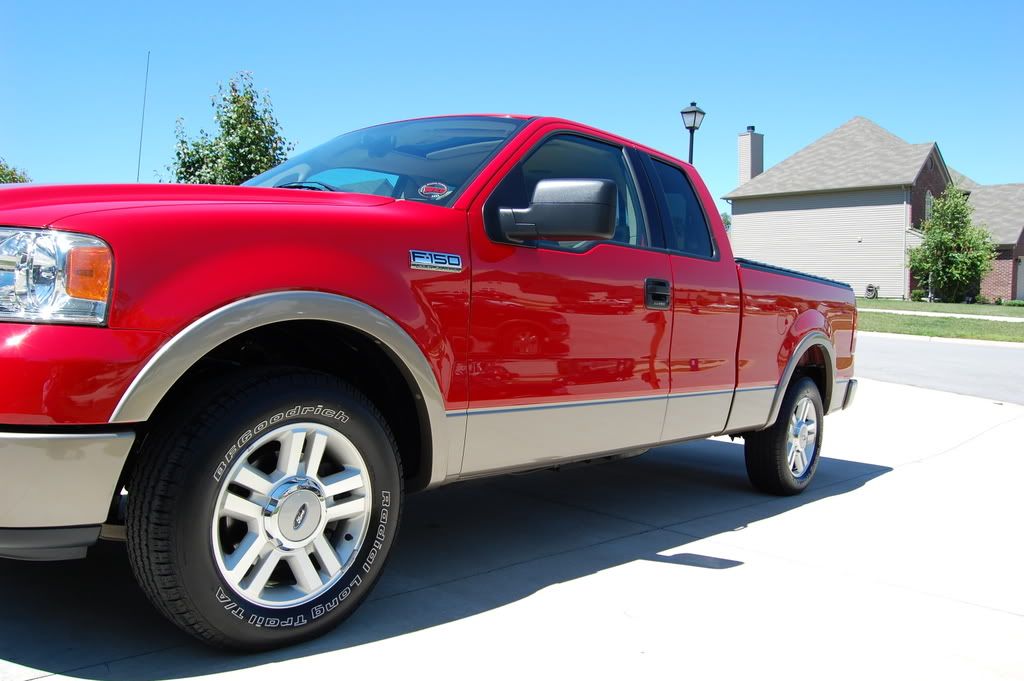
It's no Rockpick special...but here's some of my work if you have time to kill.
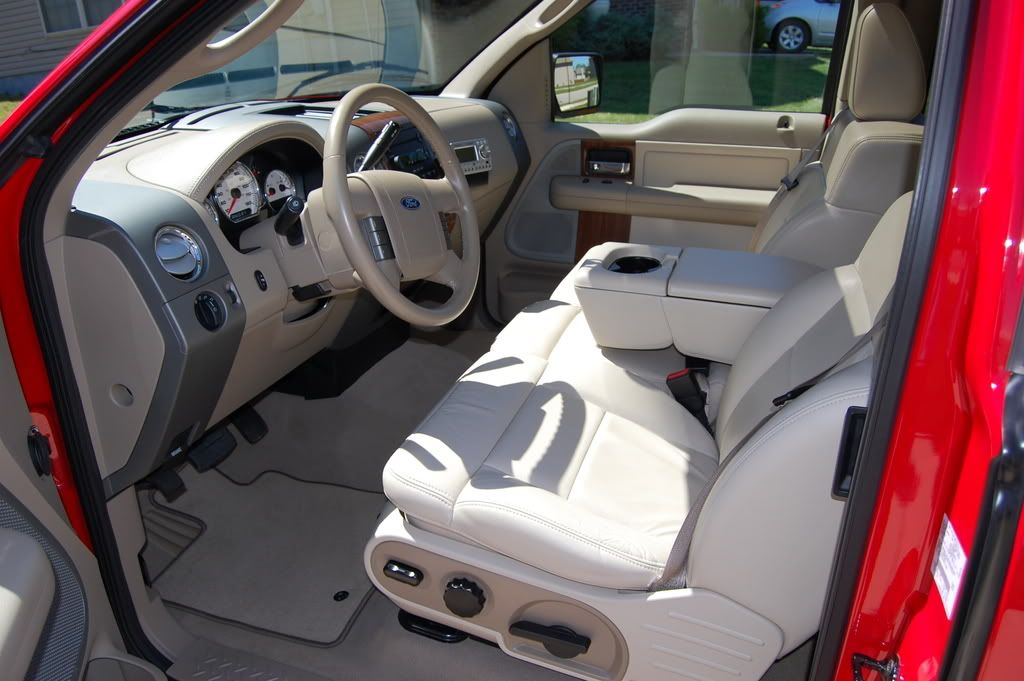
Well, sadly, I barely have any pictures... seems to be a common theme, doh!
But this was done before I got my camera, so all I got were the pictures the owner took. The outside picture is pre tire dressing...
I know they are "cheater" indoors pictures with no lights directly on them (aside from 6 METAL HALIDE lights above...), but again, the owner took them after I left. I will admit that the paint (err powder coat) wasn't as flawless as I usually like, but it was 95%~ perfect and once the M21 2.0 was on there it was impossible to see anything. I tried to show the owner defects while under METAL HALIDE lighting before the wax and he couldn't even see them...so it was pretty darn good.
Also, I worked under metal halide lighting and with halogens as well, so I am confident in my results.
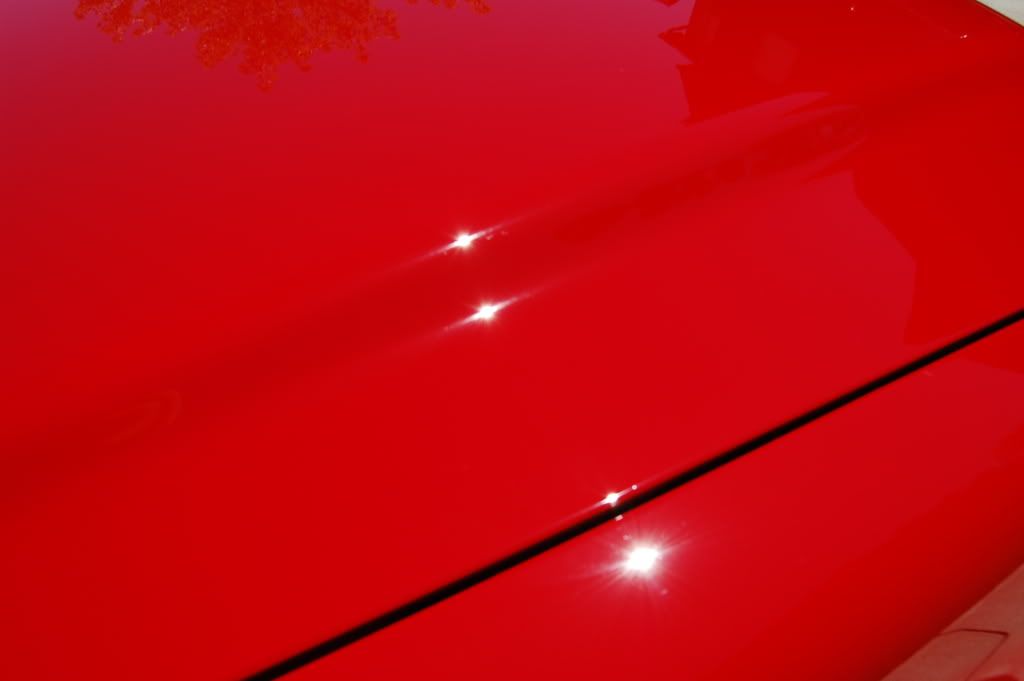
About the detail...
I would say it was most like the famous "impossible" BMW black...it is so soft, even a microfiber can mar it, but it almost "stretches" so trying to removing damage is very difficult.
I tested out MANY products, but eventually settled on M105 and a yellow Meguiar's polishing pad via rotary. I then followed that with M86 via yellow and the FLEX, followed by 3M ultrafina with a Meguiar's black SOLO finishing pad.
I would say it was 95% flawless, with a few random "tracers" left in there.
Owner couldn't see them, but I could.
Here's some pics...to get an idea, the whole detail took me about 14 hours.


Well, sadly, I barely have any pictures... seems to be a common theme, doh!
But this was done before I got my camera, so all I got were the pictures the owner took. The outside picture is pre tire dressing...
I know they are "cheater" indoors pictures with no lights directly on them (aside from 6 METAL HALIDE lights above...), but again, the owner took them after I left. I will admit that the paint (err powder coat) wasn't as flawless as I usually like, but it was 95%~ perfect and once the M21 2.0 was on there it was impossible to see anything. I tried to show the owner defects while under METAL HALIDE lighting before the wax and he couldn't even see them...so it was pretty darn good.
Also, I worked under metal halide lighting and with halogens as well, so I am confident in my results.
About the detail...
I would say it was most like the famous "impossible" BMW black...it is so soft, even a microfiber can mar it, but it almost "stretches" so trying to removing damage is very difficult.
I tested out MANY products, but eventually settled on M105 and a yellow Meguiar's polishing pad via rotary. I then followed that with M86 via yellow and the FLEX, followed by 3M ultrafina with a Meguiar's black SOLO finishing pad.
I would say it was 95% flawless, with a few random "tracers" left in there.
Owner couldn't see them, but I could.
Here's some pics...to get an idea, the whole detail took me about 14 hours.
#5
01-17-2009, 09:04 PM
Suspended
Join Date: Sep 2005
Location: San Diego
Posts: 2,622
Likes: 0
Received 0 Likes
on
0 Posts
And another....
Little background information on this detail: the Jeep is a 1997 Wrangler Sahara edition, fitted with some type of 3-link suspension which I was told something to do with the Rubicon edition...but I'm not sure what, because this thing is a LOT bigger than a Rubicon is. It sits on 35x12.50 tires, and even has a full size spare.
The paint is single stage, and white. It was sort of a cream white when I began, but became a very clean, snow-white when I finished.
The Jeep was used as a "job site vehicle" and a fun toy for an owner of a fairly large earth moving company. This Jeep is used as "Jeep" intended it be used.
That said, it was scratched and swirled quite badly. It has never had paint correction work done, but was overall in decent condition considering the age and use.
Here are some "before" pictures to outline the paint condition prior to polishing. In the first picture you can get an idea how "dirty" the paint was even after a wash.


Now of course what Jeep is complete with plenty of mud inside every single nook and cranny, and all over the underside? Right?
Little background information on this detail: the Jeep is a 1997 Wrangler Sahara edition, fitted with some type of 3-link suspension which I was told something to do with the Rubicon edition...but I'm not sure what, because this thing is a LOT bigger than a Rubicon is. It sits on 35x12.50 tires, and even has a full size spare.
The paint is single stage, and white. It was sort of a cream white when I began, but became a very clean, snow-white when I finished.
The Jeep was used as a "job site vehicle" and a fun toy for an owner of a fairly large earth moving company. This Jeep is used as "Jeep" intended it be used.
That said, it was scratched and swirled quite badly. It has never had paint correction work done, but was overall in decent condition considering the age and use.
Here are some "before" pictures to outline the paint condition prior to polishing. In the first picture you can get an idea how "dirty" the paint was even after a wash.
Now of course what Jeep is complete with plenty of mud inside every single nook and cranny, and all over the underside? Right?


#7
01-17-2009, 09:05 PM
Suspended
Join Date: Sep 2005
Location: San Diego
Posts: 2,622
Likes: 0
Received 0 Likes
on
0 Posts


Trending Topics
#8
01-17-2009, 09:05 PM
Suspended
Join Date: Sep 2005
Location: San Diego
Posts: 2,622
Likes: 0
Received 0 Likes
on
0 Posts
and continued....
Some dramatic ones with the tape gone:


Some straight on shots that show extreme details INSIDE the light...and it looks like bad orange peel, but that is the texture of the reflective backing in the light coming through nice and clearly...


Here are some after shots of the "muddy" engine bay:

Some dramatic ones with the tape gone:
Some straight on shots that show extreme details INSIDE the light...and it looks like bad orange peel, but that is the texture of the reflective backing in the light coming through nice and clearly...
Here are some after shots of the "muddy" engine bay:
#9
01-17-2009, 09:05 PM
Suspended
Join Date: Sep 2005
Location: San Diego
Posts: 2,622
Likes: 0
Received 0 Likes
on
0 Posts
and continued....

I also was tasked with dealing with two quarter sized dents with missing paint from where the hood flew open and slammed into the roof above the windshield. I actually went as far as working out the dents from the underside of the hood with a hard bottle of wax by rolling it over it with a lot of force. I would say they were 80% better by the time I finished. Sadly, like a fool I forgot to get before pictures AND the guy sold the Jeep 4 days after I finished detailing it (2 days after listing it) and I can't get more pictures.
Here are some neat little TIPS for you guys that might be doing touch-ups during a full correction job. Since I had to keep polishing between 5 coats of touch-up, and wet sanding I needed a way to keep the polish and dust from getting into the wet paint. I ended up taking the lids off of some small spray cans and using a little tape to make a flap. This allowed me to flip the lid out of the way to add the next coat, and then flip it back down to cover it while it dried. I thought they were neat, and they worked flawlessly.


The process used on the paint touch-up was to use a small artist's brush, allow the layer to fully cure, and then I would use Meguiar's Unigrit 3,000 sandpaper and level it out. Then I would put another layer. I repeated this 6-7 times. As you can see in the first pic of the "dongle" it came out pretty good, sorry for the white-washed look....I forgot the flash on.
Nothing but Meguiar's products (if they made one for the task) touched the car. It was mostly M105 doing the work.
...and here is the final big package (2 of which are finally all in one frame). Enjoy!


 (Blindingly white...lol)
Some interesting trivia from this experience: the Jeep KBB's at 10k~, and the owner claims close to $10,000 in modifications. As most people know it is rare to get ANY extra money for mods, and sometimes you get even less (people often prefer stock). That said, the owner was able to sell this Jeep in this current gas crunch slow market for $17,000 in 2 days. Think a quality detail with quality products played a role in that? You be the judge :xyxthumbs
I also was tasked with dealing with two quarter sized dents with missing paint from where the hood flew open and slammed into the roof above the windshield. I actually went as far as working out the dents from the underside of the hood with a hard bottle of wax by rolling it over it with a lot of force. I would say they were 80% better by the time I finished. Sadly, like a fool I forgot to get before pictures AND the guy sold the Jeep 4 days after I finished detailing it (2 days after listing it) and I can't get more pictures.
Here are some neat little TIPS for you guys that might be doing touch-ups during a full correction job. Since I had to keep polishing between 5 coats of touch-up, and wet sanding I needed a way to keep the polish and dust from getting into the wet paint. I ended up taking the lids off of some small spray cans and using a little tape to make a flap. This allowed me to flip the lid out of the way to add the next coat, and then flip it back down to cover it while it dried. I thought they were neat, and they worked flawlessly.
The process used on the paint touch-up was to use a small artist's brush, allow the layer to fully cure, and then I would use Meguiar's Unigrit 3,000 sandpaper and level it out. Then I would put another layer. I repeated this 6-7 times. As you can see in the first pic of the "dongle" it came out pretty good, sorry for the white-washed look....I forgot the flash on.
Nothing but Meguiar's products (if they made one for the task) touched the car. It was mostly M105 doing the work.
...and here is the final big package (2 of which are finally all in one frame). Enjoy!
(Blindingly white...lol)Some interesting trivia from this experience: the Jeep KBB's at 10k~, and the owner claims close to $10,000 in modifications. As most people know it is rare to get ANY extra money for mods, and sometimes you get even less (people often prefer stock). That said, the owner was able to sell this Jeep in this current gas crunch slow market for $17,000 in 2 days. Think a quality detail with quality products played a role in that? You be the judge :xyxthumbs
#10
01-17-2009, 10:14 PM

Senior Member
Join Date: Aug 2006
Location: Columbia Station, Ohio
Posts: 282
Likes: 0
Received 0 Likes
on
0 Posts
Tim C.

#12
01-18-2009, 03:57 AM

