

Anti freeze replacement
#1
 02-12-2006, 01:04 PM


Join Date: Jun 2003
Location: Philadelphia, PA
Posts: 394
Likes: 0
Received 0 Likes
on
0 Posts
#2
02-12-2006, 04:55 PM

Senior Member
Join Date: Nov 2003
Location: nj
Posts: 167
Likes: 0
Received 0 Likes
on
0 Posts

#3
02-12-2006, 05:17 PM

Senior Member
Join Date: Feb 2005
Location: Myrtle Beach, SC
Posts: 168
Likes: 0
Received 0 Likes
on
0 Posts
The drain is on the passenger bottom end of the radiator. Its a plastic nut that can be loosened to allow the antifreeze to flow through a drain plug. I got a pic somewhere..let me see if i can find it..
here it is...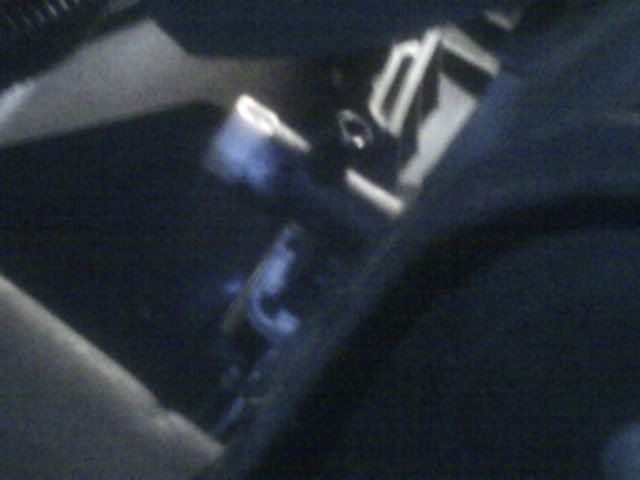
Just be careful..the last time i drained it, i was tightening the plastic nut thing back on and it broke off...")
here it is...
Just be careful..the last time i drained it, i was tightening the plastic nut thing back on and it broke off...
Last edited by noah; 02-12-2006 at 05:21 PM.

#6
02-12-2006, 06:57 PM

Senior Member
Join Date: Dec 2003
Location: O'Fallon, MO
Posts: 624
Likes: 0
Received 0 Likes
on
0 Posts
#7
02-12-2006, 06:58 PM
Senior Member
Join Date: Feb 2005
Location: Myrtle Beach, SC
Posts: 168
Likes: 0
Received 0 Likes
on
0 Posts
Originally Posted by darreli
Hey Noah, how'd you get that plastic plug out after it broke off. I broke mine off as well

Well its still broke off in there..I just left it for now since it is tightened down. But I read somewhere that the inner part of the plug fits an allen wrench so just stick the correct a.wrench in there and screw it out, put new one it. I HOPE THAT WORKS ANYHOW..
Trending Topics
#8
02-12-2006, 08:18 PM
Join Date: Jun 2003
Location: Philadelphia, PA
Posts: 394
Likes: 0
Received 0 Likes
on
0 Posts
Originally Posted by noah
The drain is on the passenger bottom end of the radiator. Its a plastic nut that can be loosened to allow the antifreeze to flow through a drain plug. I got a pic somewhere..let me see if i can find it..
here it is...
Just be careful..the last time i drained it, i was tightening the plastic nut thing back on and it broke off...
here it is...
Just be careful..the last time i drained it, i was tightening the plastic nut thing back on and it broke off...
Do you loosen it to the left or to the right?
#9
02-12-2006, 08:26 PM

#10
02-12-2006, 09:52 PM
Senior Member
Join Date: Feb 2005
Location: Myrtle Beach, SC
Posts: 168
Likes: 0
Received 0 Likes
on
0 Posts
Originally Posted by max mitchell
It's a normal counterclockwise loosen. You can use a 3/8" hose on the drain fitting. It's plastic, a firm hand tightening is fine. If you must, hand tighten and a pinch more with a wrench.
#11
02-13-2006, 08:34 AM

Senior Member
Join Date: Mar 2001
Location: CORAL SPRINGS, FL. USA
Posts: 1,352
Likes: 0
Received 0 Likes
on
0 Posts
#12
02-13-2006, 11:15 AM

Plug On 2000 F150 V6
Hey
On the f150, 2000 the nut is also plastic.Can you get the nut off with just a hand or do you need to use a wrench.I'm not good with plastic parts and nuts.
And the cap is on the plastic tank that runs to the main radiator right.I haven't looked at mine.the last first time it was changed I let the shop do it,along with a flush to the radiator.
#13
02-13-2006, 11:24 AM
Pressure testing
Hey
I just had my old 1992 radiator pressure checked .
The guy at the shop had the pressuer up to 19-20psi.
He said that the truck ran the pressure up to about 13psi on on a 4.9 f150.
We did find a few leaks in the water take.
All he did was take the vise grip and bend the small tabs.
This seem to stop the leaks.
Man I thought I over tighten the outlet on the hose clamp and cracked the fitting.But I got didn't this time.
Can a person but too much on the clamp and crack the outlet on a raditor with a plastic tank by hand with a screw driver?
I was useing a ratchet when I thought I cracked mine.
#15
07-11-2014, 09:52 AM

I just broke my plastic radiator drain off trying to open it. I can hardly believe this hasn't been posted on since 2006 (at least this is the only thread that came up in a search for "plastic radiator drain nut broke off").
Oh well, there is some good info in this thread such as easily replaceable, piece inside removed with allen wrench, and the replacement part number.
Oh well, there is some good info in this thread such as easily replaceable, piece inside removed with allen wrench, and the replacement part number.