
Alpine PKG-RSE2 Overhead Monitor Installation w/ PICS
#1
 04-07-2008, 10:28 AM


Join Date: May 2007
Location: NYC, Ct & NC
Posts: 3,460
Likes: 0
Received 0 Likes
on
0 Posts
Alpine PKG-RSE2 Overhead Monitor Installation w/ PICS
First off let me start by saying that this installation is not finish and that I dont think the pics do it any justice. I've uploaded these pics to help some ppl get started on their own installations. I will upload some more pics of the finished job later in the week. This has been a lengthy process for me but maybe thats b/c I've only been able to work on it during the weekdays after work. Enjoy! and if you have any questions, hit me up.
This is what the unit looks like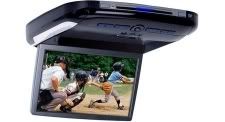
First step in the installation process is to
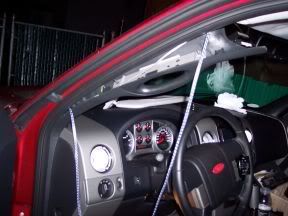
1. Remove Pillars A,B and C. Remove your map light, dome light, Sun visors, overhead bins, coat hooks and rear headliner plugs (these will be a biatch to remove). The back seat may also need to be removed, this way you can slightly remove pillar C so the headliner can drop a little
The objective here is to remove the rails out of the truck.
2. Once the liner is down and the (6) torq screws are removed from the rails, the rails should easily slide out. If not, you can squeeze the 4 little black butterfly clips together and the front of the rails should drop.
3. Once the front drops, slide the rear of the rails forward and the rear will drop.
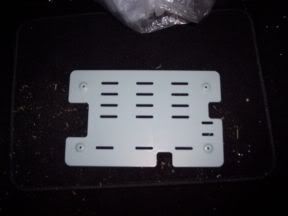
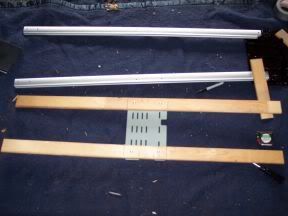
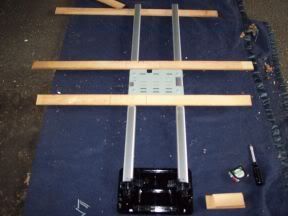
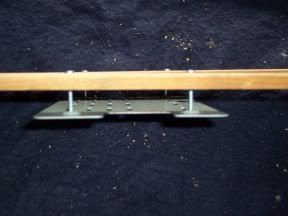
4. Once the rails are out you can use the bracket from the Apline PKG-RSE2 (assuming this is your unit of purchase) to line up your holes for the monitor.
*** In this step I would remove the front and rear black housing that the rails screw onto and screw the rails back onto them out of the truck just as if it was in the truck. This way you get an accurate measure with the bracket from rail to rail.***
5. After your measurement is determined, drill your holes.
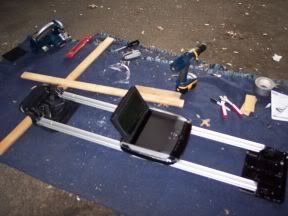
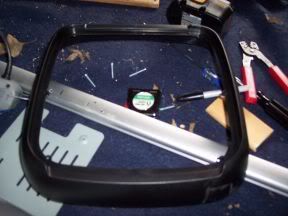
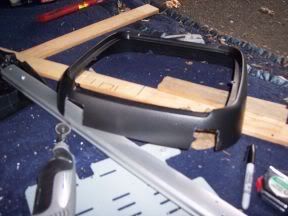
*** BE CAREFUL HERE*** Remeber that the bracket can only be installed one way on the monitor. So dont go drilling holes without matching the monitor up to the bracket and rails. You will see that in my pics I simulated my rails with wood b4 I went hole crazy.
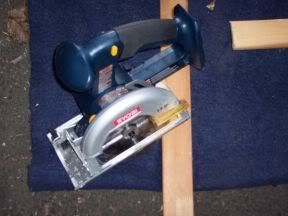
Once you have you holes drilled and and the monitor fits along the rails well its time to trim the trim ring (bezel). Here you will need to do you own measure and determine where and how to cut it. I will tell you that I used a tool called a Dremel (amazing) to cut out my 4 "U" shapes on the bezel. This will allow the Bezel to fit over the rails and make the monitor look flush. The trim ring doesnt have to be installed, its all up to you. If you think it looks good without it than skip this step.
6. The next step is to reassemble everything and connect your wires.
This is what the unit looks like
First step in the installation process is to
1. Remove Pillars A,B and C. Remove your map light, dome light, Sun visors, overhead bins, coat hooks and rear headliner plugs (these will be a biatch to remove). The back seat may also need to be removed, this way you can slightly remove pillar C so the headliner can drop a little
The objective here is to remove the rails out of the truck.
2. Once the liner is down and the (6) torq screws are removed from the rails, the rails should easily slide out. If not, you can squeeze the 4 little black butterfly clips together and the front of the rails should drop.
3. Once the front drops, slide the rear of the rails forward and the rear will drop.
4. Once the rails are out you can use the bracket from the Apline PKG-RSE2 (assuming this is your unit of purchase) to line up your holes for the monitor.
*** In this step I would remove the front and rear black housing that the rails screw onto and screw the rails back onto them out of the truck just as if it was in the truck. This way you get an accurate measure with the bracket from rail to rail.***
5. After your measurement is determined, drill your holes.
*** BE CAREFUL HERE*** Remeber that the bracket can only be installed one way on the monitor. So dont go drilling holes without matching the monitor up to the bracket and rails. You will see that in my pics I simulated my rails with wood b4 I went hole crazy.
Once you have you holes drilled and and the monitor fits along the rails well its time to trim the trim ring (bezel). Here you will need to do you own measure and determine where and how to cut it. I will tell you that I used a tool called a Dremel (amazing) to cut out my 4 "U" shapes on the bezel. This will allow the Bezel to fit over the rails and make the monitor look flush. The trim ring doesnt have to be installed, its all up to you. If you think it looks good without it than skip this step.
6. The next step is to reassemble everything and connect your wires.
#2
04-07-2008, 10:29 AM
Join Date: May 2007
Location: NYC, Ct & NC
Posts: 3,460
Likes: 0
Received 0 Likes
on
0 Posts
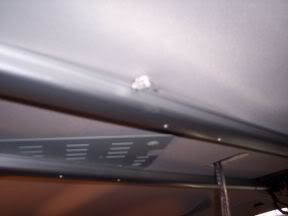
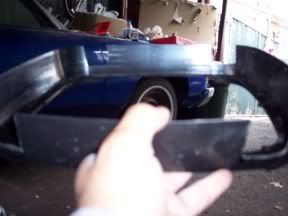
Here is the removal of Pillars A, the headliner and my wires be ran
Power, GND, Dome Light wires on the left in pic (but on the right side of headliner and the audio and video on the right side of pic but the left side of headliner when installed.
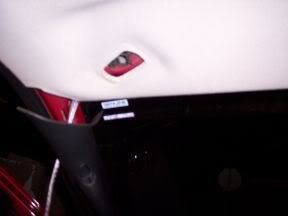
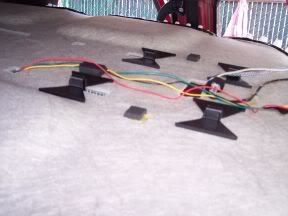
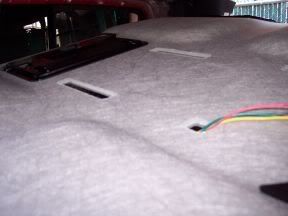
Power, GND, Dome Light wires on the left in pic (but on the right side of headliner and the audio and video on the right side of pic but the left side of headliner when installed.
Last edited by pmason718; 04-07-2008 at 10:33 AM.
#3
04-07-2008, 10:35 AM
Join Date: May 2007
Location: NYC, Ct & NC
Posts: 3,460
Likes: 0
Received 0 Likes
on
0 Posts
#6
04-07-2008, 10:43 AM
Join Date: May 2007
Location: NYC, Ct & NC
Posts: 3,460
Likes: 0
Received 0 Likes
on
0 Posts
#7
04-07-2008, 10:46 AM

Senior Member
Join Date: Apr 2007
Location: Slidell, LA
Posts: 4,494
Likes: 0
Received 0 Likes
on
0 Posts
Trending Topics
#8
04-07-2008, 10:47 AM
Join Date: May 2007
Location: NYC, Ct & NC
Posts: 3,460
Likes: 0
Received 0 Likes
on
0 Posts
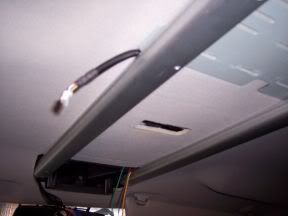
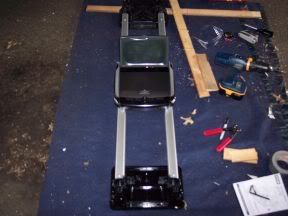
Right here you can see how the trim bezel fits over the rails with the monitor
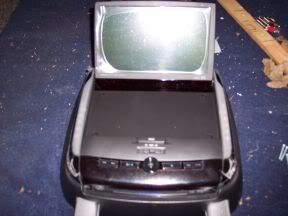
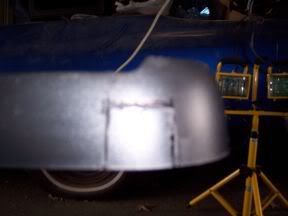
And Here is the finish product. The pics (horrible Kodak camera) does it no justice, also Im not finish. I will upload some pics of the installation once Im done and every thing is put back together and clean. I will also get some pics of video on it and possible a video of the screen in action but that will be later in the week so keep checking back if this is something you would like to do to your truck.
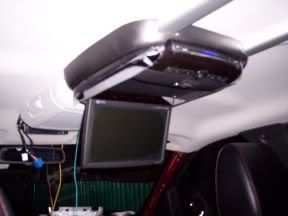

And Here is the finish product. The pics (horrible Kodak camera) does it no justice, also Im not finish. I will upload some pics of the installation once Im done and every thing is put back together and clean. I will also get some pics of video on it and possible a video of the screen in action but that will be later in the week so keep checking back if this is something you would like to do to your truck.
#9
04-07-2008, 10:48 AM
Join Date: May 2007
Location: NYC, Ct & NC
Posts: 3,460
Likes: 0
Received 0 Likes
on
0 Posts
Originally Posted by Low_e_Red
I just got my PKG-RSE2 in last night. Cost me 125. 
Cant wait to get it up there.
Cant wait to get it up there.
I would love to pics of your installation once your done. I paid $699 for mine at Crutchfield. If I worked at CC I would take advantave of the price too, lol.
Last edited by pmason718; 04-07-2008 at 10:51 AM.
#10
04-07-2008, 10:50 AM
Senior Member
Join Date: Apr 2007
Location: Slidell, LA
Posts: 4,494
Likes: 0
Received 0 Likes
on
0 Posts


#14
04-07-2008, 11:05 AM
Senior Member
Join Date: Apr 2007
Location: Slidell, LA
Posts: 4,494
Likes: 0
Received 0 Likes
on
0 Posts
Originally Posted by pmason718
Let me know if I can get that hook up then. I will return this in a heartbeat, lol
And the open box products that cant be resold because something is missing goes there, also things that LP caught stealing. And products past street date. Ya, all its missing is the headphones and remote. And I have both coming.
I just bought 11 Viper 571XV for 35 bucks a piece. Spent 400 and someone is buying one for 100. Two for other cars. And the others are Xmas presents.. (I know its early)